My jaw dropped when I saw the ingredients in store-bought tortillas. Corn syrup solids, canola oil, processed sugars… immediately no. We can do so much better AND save $$$ while we were at it. These tortillas come together beautifully with the wonder of sourdough and a good cast iron skillet. This recipe has served me well for YEARS, staying at the top of my kids favorite foods list.
Before making my own tortillas, I was buying them from the store for a pretty penny. This was convenient but not doing me any further favours. Health wise after all there was a better option quite blankly starting me in the face and it would also save me money on a weekly basis.
I have said it before and will say it all my life long: if you want to save money, start the journey of making all your own bread from home. Beyond just saving us $1000s on dollars in past years, it has also been a game changer for our health and well being.
And nothing quite beats a hot fresh tortilla.
Why Sourdough Discard?
I was gluten free for years after experiencing migraines and headaches anytime I touched gluten. A friend told me that they found they were able to enjoy ALL glutenous goodness as long as it was made with a fermented sourdough starter. This intrigued me because GF bread was just not doing it for me.
Within 24 hours, I got myself a sourdough starter and began to figure this out. Within a week of eating sourdough fermented breads and baked goods, I boasted of zero migraines/headaches AND even saw my skin clearing up.
Fast forward to now, I bake all our own bread or baked goods by use of an active sourdough starter or with the discard. Either way, my body (and my family’s body!) loves it!
This recipe does just use a sourdough discard and is not an overnight fermentation option, which really is the best for your gut, but that doesn’t mean sourdough discard is without its own goodness.
Here are some sourdough discard facts for you:
- Sourdough discard goods are easier to digest: It contains a natural bacteria and variety of probiotics which promote a healthy gut and overall, a better digestive system. Basically, very gentle on your gut!
- Blood sugar friendly: Sourdough discard works against and balances any bad starches and ingredients that can cause your blood sugar levels to rise and spike.
- Full of good acid: The acid in sourdough breads and sourdough discards can help your body process foods easier and absorb more minerals, yielding a stronger immune system and better health.
- Fibrous: Sourdough discard is loaded with fibre to help you feel fuller for longer and lower cholesterol.
- The flavour: Sourdough has a tang and flavour like no other bread or baked good. It is hearty, satisfying and extremely delicious, whether it is fermented or made with sourdough discard.
- Vitamins and minerals: From iron to zinc to vitamin B, sourdough discard contains a variety of essential vitamins and minerals!

Sourdough Tortilla Ingredients
- Water: I use a filtered, lukewarm water.
- Sourdough Discard: If you have a bubbly starter, that will also work too! My discard is typically room temperature.
- Olive Oil: Oil will help to soften the texture and give it a good chew and tear.
- Flour: The flour I use is sourced from an organic mill in my area, but any all purpose flour will do!
- Salt: I always use sea salt for the best flavour and health benefits!
- Sugar: Even honey works here! I use an organic cane sugar.
To make this recipe, I use these tools. Click the text to shop:
*Some links are affiliate*
This dough can be a little tricky to get the hang of depending on your discard hydration and the pull of the dough. Using flour to dust your work surface is super helpful and a marble rolling pin will be your BFF. Continue to roll, stretch and press until you yield a nice thin tortilla.
How To Make Sourdough Tortillas From Scratch
Quick recipes are my favourite and this one is no exception. I can get these done within 2 hours making it amazing for busy lifestyles and hungry families! And for 1 of those 2 hours they are just resting on the counter to encourage flavour and texture. Mom win!
The dough can be mixed by use of a bread machine or a stand mixer using a dough hook attachment, but I always find myself using my hands for this one. I do not like this particular dough to go thru any heating cycle so I just let the room temperature do its work. If you are making this in a warm environment (in Spring or Summer) you may notice a more sticky or flexible dough. Add more flour or chill in the fridge for a few minutes if you experience this.

Baker’s Timeline:
Since this is a discard recipe, it can be made same day! All the same, here is a bit of a timeline to help you out and give you an idea of what this may look like in a given day. As you can see, this is quick and takes very little time (especially hands on time) to complete!
STEP 1: MAKE THE DOUGH
In a medium bowl, combine your water, discard and olive oil, stir well. Sprinkle on top of the wet ingredients your flour, sea salt and sugar. Using your fingers, stir your dry ingredients gently on the top and then start to combine your wet and dry ingredients together.
Once the dough is combined in the bowl, cover with a damp towel and knead again after 15-30 minutes. I like to do this on a non-floured counter until the dough is glossy and not too sticky at all. Then cover again with a damp towel and let rest for 30 minutes.
STEP 2: ROLL & COOK
Divide your dough into 10 equal pieces, shape into balls and again cover for another 30 minutes on the counter.
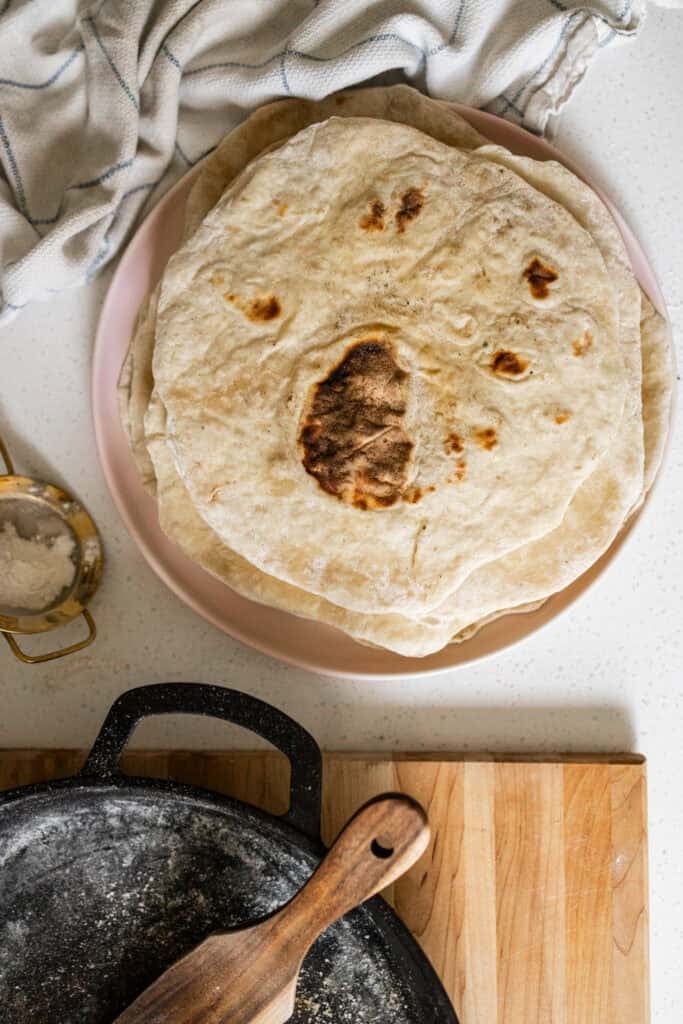
I use either a non-stick pan or my cast iron for this on a medium heat. These cook fast, so be attentive! If they over cook, they get crispy and we want soft tortillas!
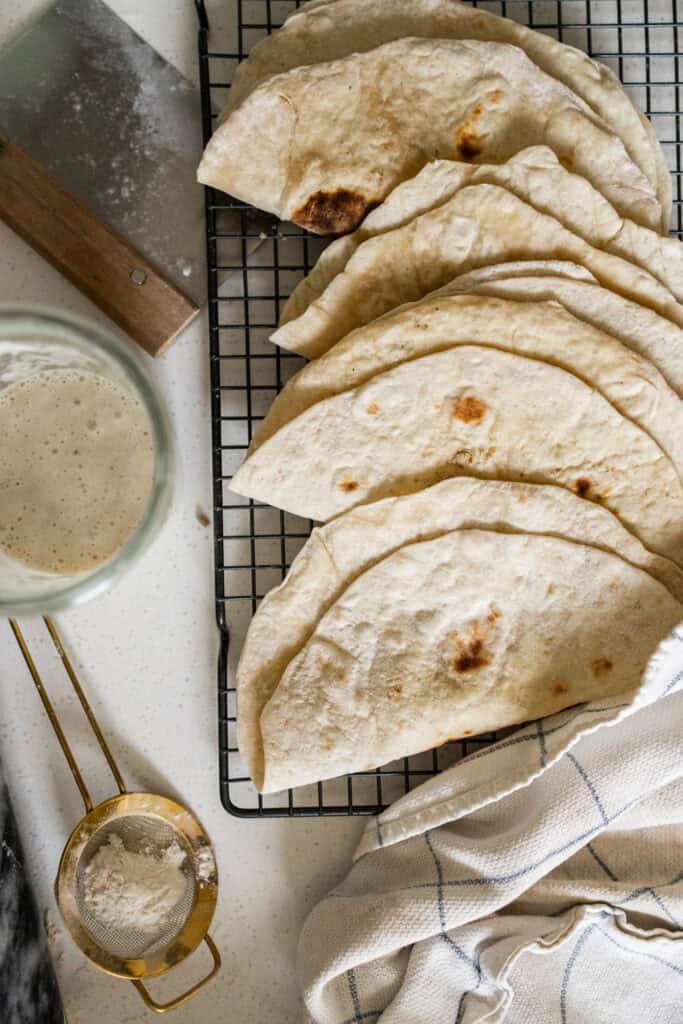
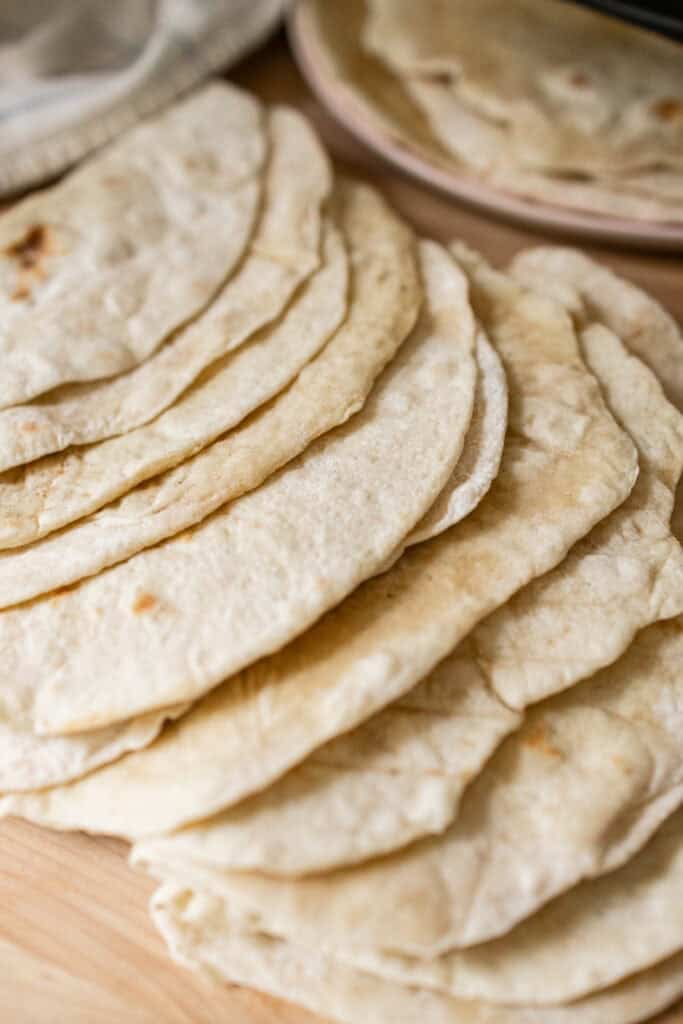
On a floured surface, use a rolling pin to roll your dough piece thin. I make my tortillas about 9″-10″. Use lots of flour on the counter and on top of the dough if it really starts sticking. Take your tortillas and place it on the hot pan and cook until it bubbles. Flip and continue to cook the other side. When finished cooking each tortilla, place on a plate under a very damp towel. This will stop it from drying out!
STEP 3: ENJOY
Repeat to all your dough and eat warm!
Stay In The Loop!
Sign up and get my posts sent right to your inbox!
How To Store
Keep your tortillas in an airtight container or bag in the fridge for 7 days and reheat to enjoy again.
If you enjoyed this recipe, be sure to share and tag me @sarahthereseco on Instagram and come back here to rate and leave a comment!

Ingredients
- 1¼ Cups Water
- 180 Grams Sourdough discard
- 1 Tablespoon Olive oil
- 3½ Cups Flour
- 1 Teaspoon Sea salt
- 2 Teaspoons Sugar
Instructions
- In a medium bowl, combine your water, discard and olive oil, stir well. Sprinkle on top of the wet ingredients your flour, sea salt and sugar. Using your fingers, stir your dry ingredients gently on the top and then start to combine your wet and dry ingredients together. This may be quite sticky but that is okay! We will have a rest period here which will help the dough reduce stickiness and stay uniform.
- Once the dough is combined in the bowl, cover with a damp towel and knead again after 15-30 minutes. I like to do this on a non-floured counter until the dough is glossy and not too sticky at all. Then cover again with a damp towel and let rest for 30 minutes.
- Divide your dough into 10 equal pieces, shape into balls and again cover for another 30 minutes on the counter.
- Ready to cook these!
- I use either a non-stick pan or my cast iron for this on a medium heat. These cook fast, so be attentive! If they over cook, they get crispy and we want soft tortillas!
- On a floured surface, use a rolling pin to roll your dough piece thin. I make my tortillas about 9″-10″. Use lots of flour on the counter and on top of the dough if it really starts sticking. Take your tortillas and place it on the hot pan and cook until it bubbles. Flip and continue to cook the other side. When finished cooking each tortilla, place on a plate under a very damp towel. This will stop it from drying out!
- Repeat to all your dough and eat warm!
- These keep in the fridge for a week and reheat beautifully.