As a mom of 5, I am constantly working on making my mornings easier, particularly when it comes to food preparation. These sourdough freezer biscuits were created to ease my breakfasts without compromise. By simply making and freezing these, you will be able to wake and bake with ease whenever you need a break! This is not too good to be true.
Once I started having kids, my Ma Ingalls heart started bursting. I was excited to make more and more from home, using my hands in the name of saving money, better ingredients and pure joy. Fast forward to having my 5th, I saw that this wasn’t going to be as simple as I thought. In fact, it was hard. But after learning some kitchen tricks and using my head, I came up with a variety of go to recipes for easier mornings and satisfied kids.
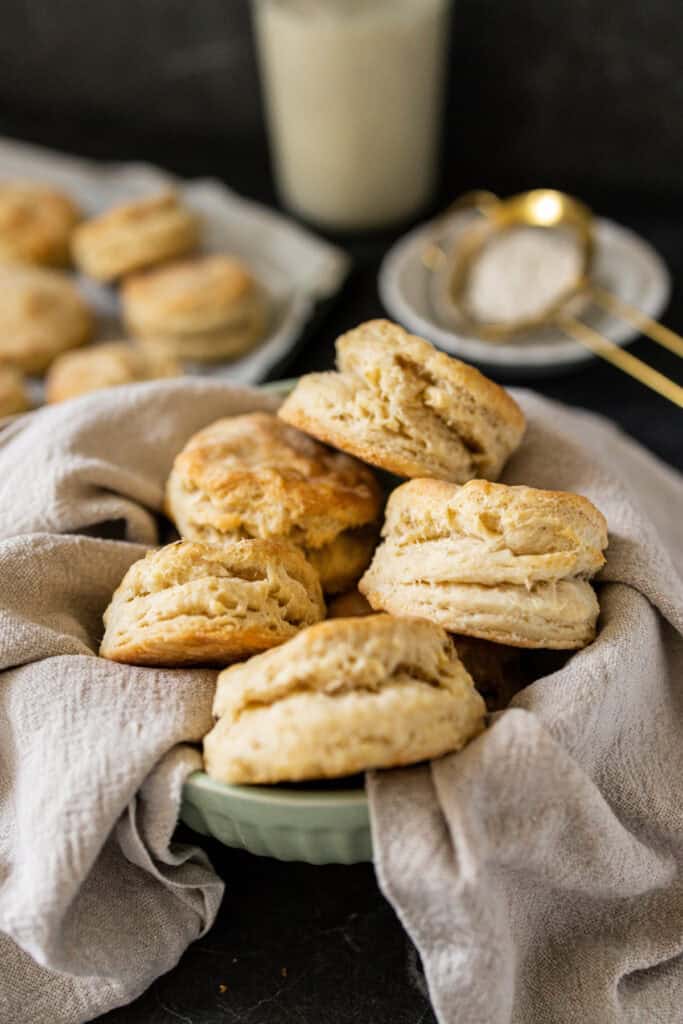
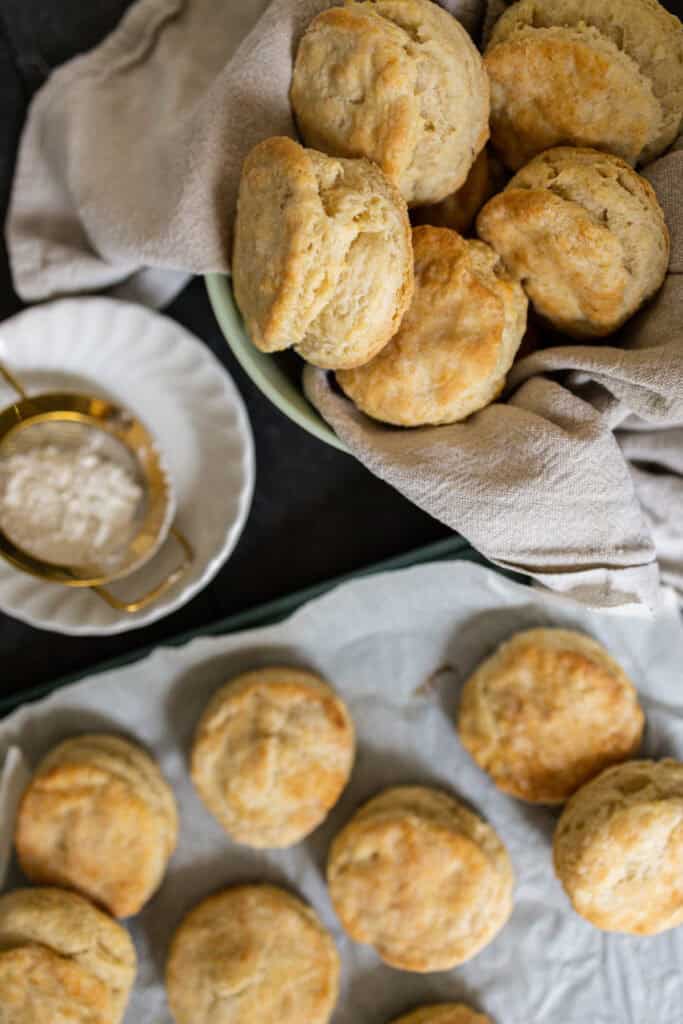
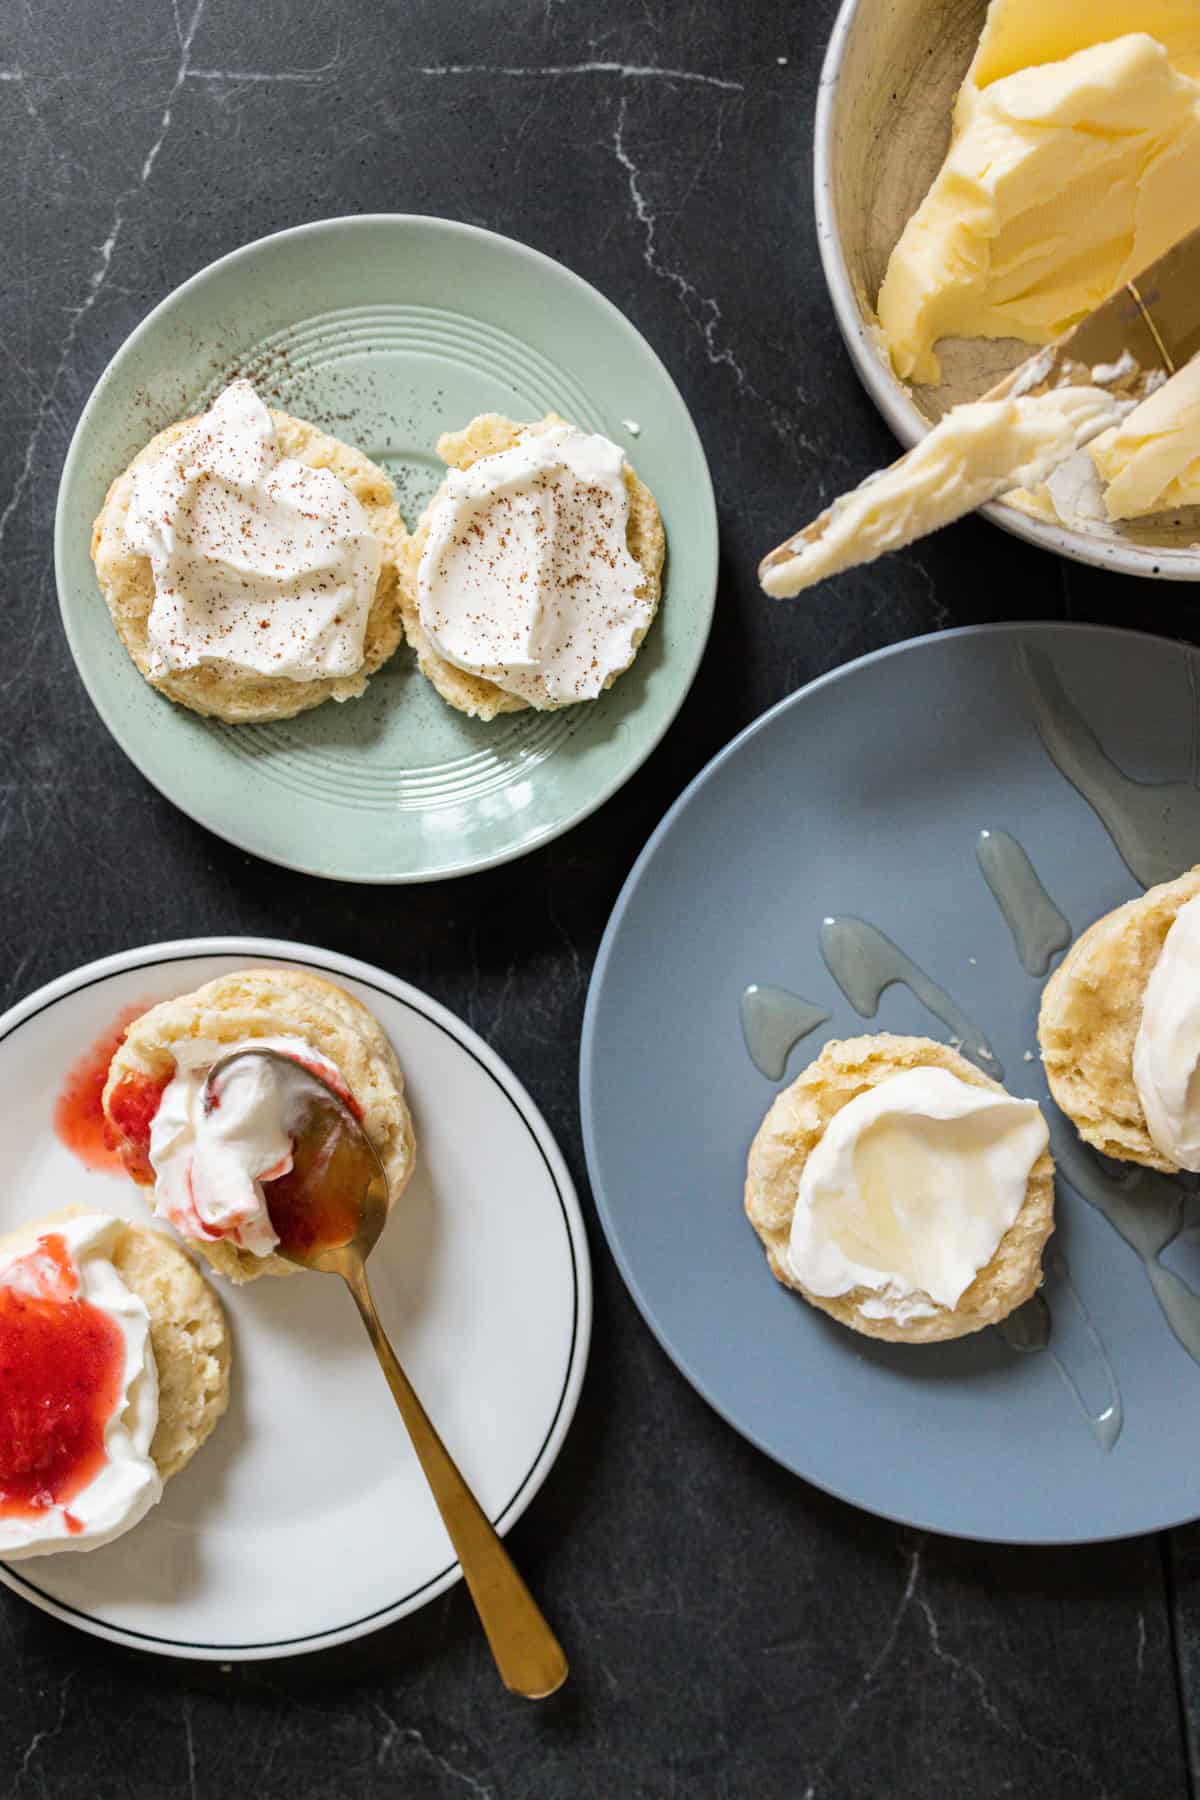
Biscuits may be a breakfast staple but we also enjoy putting these onto chicken pot pies, serve alongside afternoon tea (or coffee!) or simply indulge when the time seems right. By making them in advance, you will be able to enjoy warm fresh biscuits straight from the oven whenever you desire! I should go hug my freezer quick…
Of course, we are taking advantage of our sourdough starter by making these a gut friendly option compared to anything you can buy at the store!
Want some more easy breakfast recipes? Try my Egg Bites & Breakfast Cookies!
Why Fermented Sourdough & Sourdough Discard?
I was gluten free for years after experiencing migraines and headaches anytime I touched gluten. A friend told me that they found they were able to enjoy ALL glutenous goodness as long as it was made with a fermented sourdough starter. This intrigued me because GF bread was just not doing it for me.
Within 24 hours, I got myself a sourdough starter and began to figure this out. Within a week of eating sourdough fermented breads and baked goods, I boasted of zero migraines/headaches AND even saw my skin clearing up.
Fast forward to now, I bake all our own bread or baked goods by use of an active sourdough starter or with the discard. Either way, my body (and my family’s body!) loves it!
This recipe does use either a sourdough discard or active starter but is not having an overnight fermentation, which really is the best for your gut. All the same, it is sitting in the freezer overnight and once baked, will still hold some sourdough benefits for your body!
Here are some sourdough facts for you:
- Sourdough goods are easier to digest: It contains a natural bacteria and variety of probiotics which promote a healthy gut and overall, a better digestive system. Basically, very gentle on your gut!
- Blood sugar friendly: Sourdough works against and balances any bad starches and ingredients that can cause your blood sugar levels to rise and spike.
- Full of good acid: The acid in sourdough breads and sourdough discards can help your body process foods easier and absorb more minerals, yielding a stronger immune system and better health.
- Fibrous: Sourdough (especially discard!) is loaded with fibre to help you feel fuller for longer and lower cholesterol.
- The flavour: Sourdough has a tang and flavour like no other bread or baked good. It is hearty, satisfying and extremely delicious, whether it is fermented or made with sourdough discard.
- Vitamins and minerals: From iron to zinc to vitamin B, sourdough discard contains a variety of essential vitamins and minerals!
- Good for GF sensitivities: In the creation of sourdough bread, gluten is broken down overtime and has changed into amino acids before you enjoy it. This aids in easier digestion and gut health.
- Less preservatives: Sourdough preserves itself naturally using acetic acid, nothing fake here!

Sourdough Freezer Biscuits Ingredients
- Flour: The flour I use is sourced from an organic mill in my area, but any all purpose flour will do!
- Baking Powder
- Baking Soda
- Salt: I use sea salt.
- Cold Unsalted Butter: If using salted, do not add any salt to the mix.
- Sourdough: Either active or discard works here!
- Milk: Use ANY milk. My kids like it with Whole milk and I prefer it with a clean almond milk.
To make this recipe, I use these tools. Click the text to shop:
*Some links are affiliate*
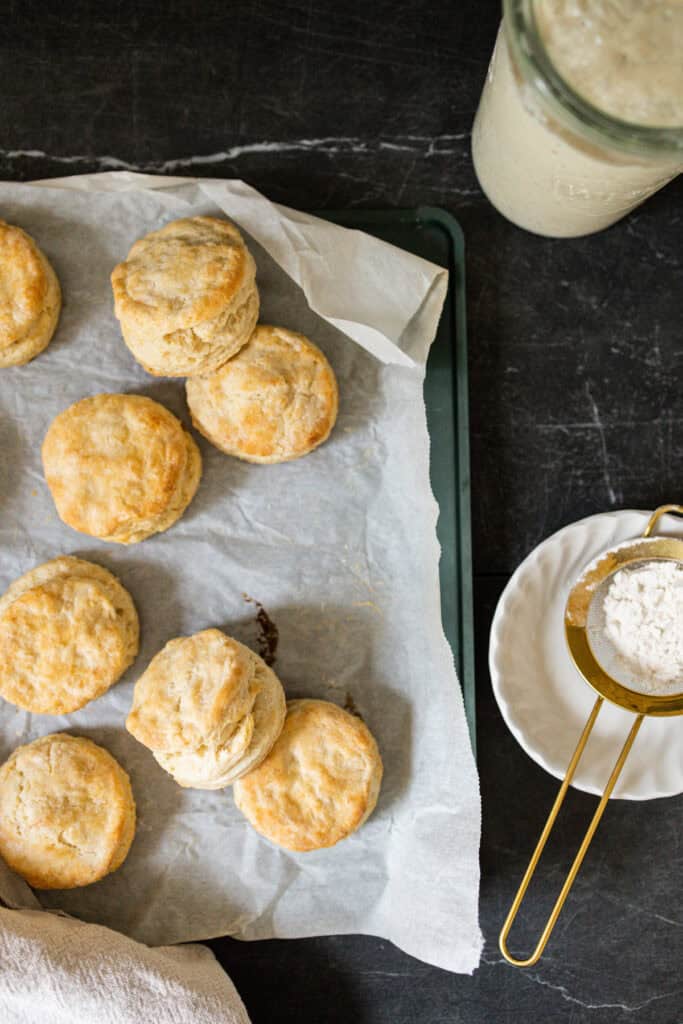
Make a large batch of these at the beginning of the month and freeze. When you need a quick round of biscuits, simply take them frozen onto a baking tray and bake until brown!
How To Make Sourdough Freezer Biscuits From Scratch
More often than not, I make a batch or two of these in the evening with whatever discard or active starter I have on hand, and bake them in the morning for a crowd pleasing breakfast.
The dough is simply mixed by hand, rolled out onto your countertop, cut into circles and flash frozen before moving them into a freezer safe container. The entire preparation process now takes me about 10 minutes!

Baker’s Timeline:
My timeline below is for if you are wanting to make, freeze and bake these sourdough biscuits the next day. If you are simply making these biscuits to freeze and have on hand, do so! But if you want to enjoy these the next day, here is how it usually goes for me. Again, since these are frozen, this recipe is nothing but flexible and convenient for whatever you have planned!
STEP 1: MAKE THE DOUGH
Combine your dry ingredients in a medium sized bowl and mix well. Taking your cold butter, cut it into the dough using a pastry cutter until the mixture is a fine clump crumb texture. Add in your sourdough discard and milk and stir again.
Using my hands, I start to press the dough and forming it into a ball.
Flour your surface, place the dough on top and begin to roll it out until it is about 3/4 inch thick. Take a round cutter or glass and press this into the dough to create your biscuit shape.
STEP 2: FREEZE
Place each biscuit onto a cookie sheet lined with parchment paper and flash freeze for 20 minutes. This will help them not stick and stay in a good shape for transfer and storage.
Remove them from the freezer and place them into a freezer safe container. Place a parchment paper in between the biscuit layers to prevent sticking.
STEP 3: BAKE
When ready to bake, preheat your oven to 400° and bake your biscuits on a parchment paper lined sheet for 20 minutes or until golden brown.
Stay In The Loop!
Sign up and get my posts sent right to your inbox!
How To Store
These keep for 7 days in the fridge in a plastic bag or airtight container and reheat beautifully!
If you enjoyed this recipe, be sure to share and tag me @sarahthereseco on Instagram and come back here to rate and leave a comment!
Sourdough Freezer Biscuits
Ingredients
- 2½ Cups Flour
- 2½ Teaspoons Baking Powder
- ½ Teaspoon Baking Soda
- 1 Teaspoon Salt
- ⅔ Cup Cold Unsalted Butter
- 235 Grams Sourdough Discard
- ⅔ Cup Milk
Instructions
- Combine your dry ingredients in a medium sized bowl and mix well. Taking your cold butter, cut it into the dough using a pastry cutter until the mixture is a fine clump crumb texture. Add in your sourdough discard and milk and stir again. Do not over mix or let this butter soften. Work quick here.
- Using my hands, I start to press the dough and forming it into a ball. I like to remove my dough from the bowl at this time and press the dough into a ball on the counter. If feels overly sticky, add a bit of flour.
- Flour your surface, place the dough on top and begin to roll it out until it is about 3/4 inch thick. Take a round cutter or glass and press this into the dough to create your biscuit shape. Do not spin the glass or cutter but just press down to keep the edges lifted for a nice rise in the oven.
- Continue until you have run out of space for more biscuits, reroll your dough and continue to cut circles until you have no more.
- Place each biscuit onto a cookie sheet lined with parchment paper and flash freeze for 20 minutes. This will help them not stick and stay in a good shape for transfer and storage.
- Remove them from the freezer and place them into a freezer safe container. Place a parchment paper in between the biscuit layers to prevent sticking.
- Keep these in the freezer overnight or for up to 2 months before baking.
- When ready to bake, preheat your oven to 400° and bake your biscuits on a parchment paper lined sheet for 20 minutes or until golden brown.
- These keep for 7 days in the fridge and reheat beautifully!
The absolute best biscuits I’ve ever had (and I’m from the South!)!! I’m 37.5 weeks pregnant with my first babe and needed some healthy and gut friendly freezer postpartum meals, sides, and snacks. This popped up into my email at the best time! Can’t wait to get my hands on these again when my little girl arrives. Thank you, Sarah!
So thankful these work well for you! Praying over you and baby!
These are delicious and so easy to make! A bonus, my 3 year old loves them too. Thanks for sharing such an easy, healthy, family friendly recipe. I am so excited to try more of your recipes!
I am 36 weeks with my first and making these today for pp! They seem very perfect for a snack alongside broth and stews that will be easy to digest and full of all the good stuff. My freezer is slowly accumulating many of your bread recipes to reheat after baby boy arrives 😊 Every one of your recipes turn out SO well!
So so delicious! We make this weekly! I was inspired to eat them with whipped cream and jam too, and there’s really nothing better.
These were so good! I decided to use these the day off instead of freezing, and baked 18 minutes instead of the full 20 (my butter was frozen when I grated it, so I’m guessing that effected bake time). Delicious! Thank you for sharing this, Sarah!
Hi Sarah!
My husband is dairy free, have you experimented at all with coconut oil instead of butter in this recipe? Thank you!
Hi! I have not, nor do I think it would work. With THAT amount of coconut oil, it would just be a sloppy oily mess. Even plant based butters don’t work well for these biscuits. Butter is hard to beat!
I have tried these with vegetable butter which is vegan therefore no lactose should be included since butter is so expensive in my country. They came out great, fluffy, flaky, just delicious. Just make sure not to overmix it since I find that vegetable butter is softer than regular and needs even faster working with than regular butter.
Hello, when I want to replace butter with any kind of oil, I use this: 50g butter = 35g oil
It works well.
GIRL. This is my 5th or 6th recipe of yours I’ve tried and I’m obsessed. So easy, SO delicious! I’ve been sharing your website with everyone I know! What a true gift you have! Thanks for creating super yummy food for me and my family to enjoy☺️🫶🏼 KEEP IT COMIN’!
These biscuits are wonderful! They are so easy to whip up and taste great both fresh and out of the freezer. 10/10!
These are amazing! so easy and so yummy thank you for sharing!
update: These cook great as is! No need to freeze if you really want them right away😅
Made my second batch for the week because having them on hand in a busy household is brilliant! We pop them in the air fryer for 10 minutes and they’re browned to perfection.
These are my new favorite thing. I will be keeping a stock of these in the freezer from now on. Thank you for this successful innovation.
I can’t believe how amazing these biscuits are. When I bake them in the airfryer at 400 for 10 min they come out with a crunch on the outside but baked and pillowy on the inside. Well done you for this recipe, I have a whole stack of your recipes that I’m trying now!
Absolutely amazing every single time! Whether you bake them right away or freeze them for another time! I cannot believe the texture and taste that the discard gives these biscuits, dare I say better than buttermilk biscuits! Thank you for sharing!
These are the best biscuits I’ve ever had! I’ve made them plain, and I’ve also added cut up pickled jalapeños and shredded Colby and cheddar cheeses. The jalapeño cheese biscuits have become a staple in our house
I added these yummy biscuits to my recipe book. Reading the comments and so many pregnant ladies are making these! I’m expecting our fifth baby in May 2025. These are not just for postpartum in our household, but a staple in our breakfast rotation. Thank you, Sarah!
Wow! I’m from the Netherlands and I didn’t know this kind of biscuits before. They are delicious!! I used 1/3 wholewheat speltflour and 2/3 all purpose flour. Baked them in the airfryer. Definitely will make them again. Thanks for the recipe!
(I forgot to rate… Absolutely 5 stars!
We have tried 6 of your recipes so far and they’ve all been amazing! (The pizza and bagels ones are a family favorite for sure) Trying this one now! I saw you did them in the skillet in one of your videos. Did you cold ferment them first? And also, did you happen to cook them at 400 degrees too? They looked so good so trying to recreate them now 😀
Delicious, fluffy, convenient… thanks!
Easy and delicious! I’ve made them several times!
These are my absolute go-to. The Best Biscuits Ever!!! Sarah Therese, you are a true artisian when it comes to food-stuffs ❤️ Thank you for sharing these recipies with us for free 🙏🏻 Cheers from Sweden