Sourdough breadsticks have become the perfect addition to any meal of ours that needs a delicious side. These are flavourful, tangy, soft and simple to make. They never last beyond a mealtime because they are gone within 10 minutes of me setting them out!
Whether I have a soup simmering on the stove or meat on the BBQ, these sourdough breadsticks serve us very well when it comes to meal pairing. And the best part is the creativity you can have with toppings! We use melted butter to olive oil to garlic to herbs to pepper to anything! Plus, we are OF COURSE fermenting them with the wonder of our active sourdough starter.
Using an active starter will help with a more robust flavour and also encourage a light, soft dough for our breadsticks. Making breadsticks from home not only is better for you, but also better cost wise. These cost me just a few dollars to make instead of paying $8 at the store!
Why Sourdough?
I was gluten free for years after experiencing migraines and headaches anytime I touched gluten. A friend told me that they found they were able to enjoy ALL glutenous goodness as long as it was made with a fermented sourdough starter. This intrigued me because GF bread was just not doing it for me.
Within 24 hours, I got myself a sourdough starter and began to figure this out. Within a week of eating sourdough fermented breads, I boasted of zero migraines/headaches AND even saw my skin clearing up.
Fast forward to now, I bake all our own bread by use of an active sourdough starter or with the discard. Either way, my body (and my family’s body!) loves it!
Here are some sourdough facts for you:
- Sourdough is easy to digest: It contains a natural bacteria and germ in the fermentation process that will break down the starches in the grains before they even hit your stomach. Basically, very gentle on your gut!
- Blood sugar friendly: With sourdough being fermented, it works against any bad starches and ingredients that can cause your blood sugar levels to rise and spike.
- Full of good acid: The acid in sourdough breads can help your body process foods easier and absorb more minerals, yielding a stronger immune system and better health overall.
- Good for GF sensitivities: In the creation of sourdough bread, gluten is broken down overtime and has changed into amino acids before you enjoy it. This aids in easier digestion and gut health.
- Less preservatives: Sourdough preserves itself naturally using acetic acid, nothing fake here!
- The flavour: Sourdough has a tang and flavour like no other bread. It is hearty, satisfying and extremely delicious.
Sourdough Breadsticks Ingredients
- Active Sourdough Starter: This is what will work to ferment our dough, create an amazing flavour and help the dough to form air bubbles and tenderness.
- Water: I prefer using filtered water at room temperature for best results in my rising of the dough.
- Coconut Oil: Using a healthy fat, such as coconut oil, will help soften the bread and give it a good chew and tenderness.
- Flour: The flour I use is sourced from an organic mill in my area, but any all purpose flour will do!
- Sugar: This is used to soften the bread so it stays tender thru the entire process. I use an organic cane sugar.
- Salt: A little bit of salt goes a long way to help bring out the best flavours. I use any sea salt I have on hand for this recipe.
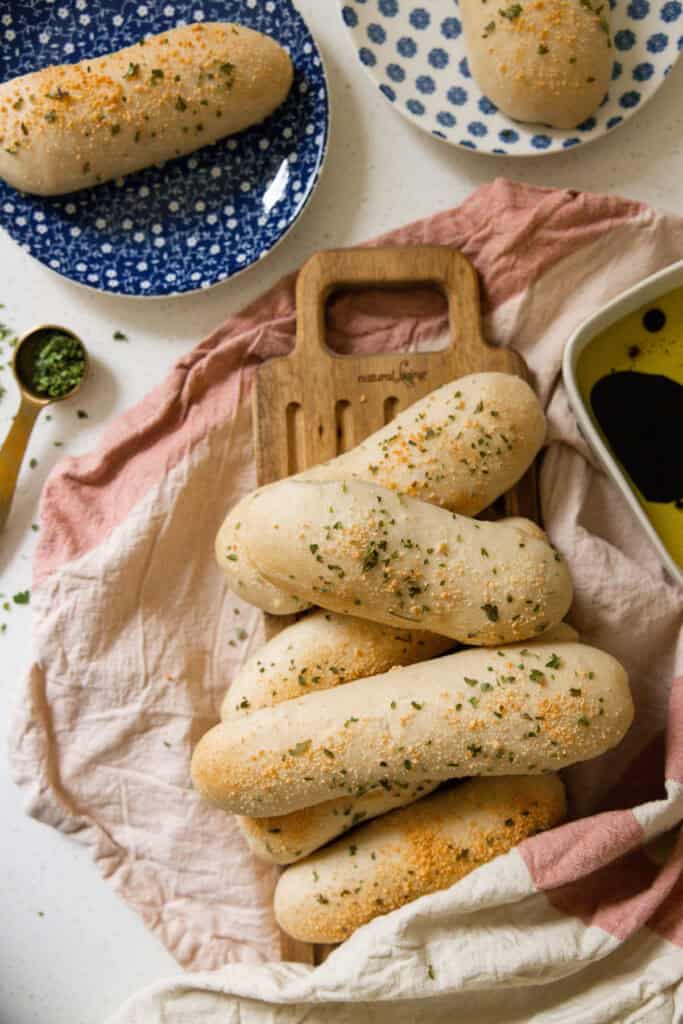
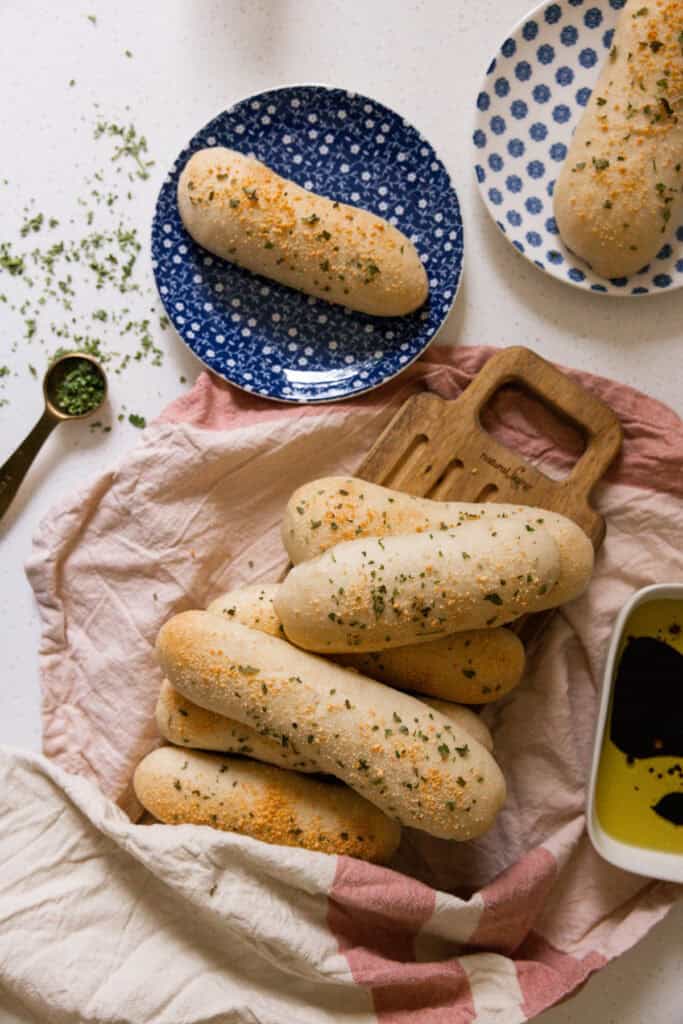
- Toppings: Get creative here! You can use cheese, garlic, flakey salt, herbs, etc.
To make and store this recipe, I use these tools. Click the text to shop:
*Some links are affiliate*
If you like smaller breadsticks, make 20 breadsticks from this recipe instead of the 12 and roll them to be quite skinny. This recipe does yield a larger, puffier breadstick. We also enjoy making these breadsticks unique looking by twisting or braiding the dough before our final bake!
How To Make Sourdough Breadsticks From Scratch
First, make sure you start the night before you plan on eating these breadsticks. If I want to enjoy this Tuesday, I will make the dough Monday evening. It needs that overnight rest to properly ferment and rise the dough.
The dough can be mixed by use of a bread machine or a stand mixer using a dough hook attachment. I prefer my bread machine since it kneads and rises my dough overnight while I sleep!

Baker’s Timeline:
This can be started or made at any time. I like to start doughs at night time so they can rise all night. In the morning, they are ready to shape and bake. The time slots are to be looked at as starting that step in between those times. You can easily stretch these times in the day to make it work best for the meal or time you are preparing it for.
STEP 1: MAKE THE DOUGH
Combine your wet and dry ingredients, using either a bread machine or a stand mixer and let the dough sit covered in a warm place overnight. The dough while develop in flavour and texture during this time.
STEP 2: SHAPING THE DOUGH
Remove your dough from the bowl onto a non floured surface and gently divide the dough into 12 pieces. Trying your best to not overly press/stress the dough by removing air that has formed inside itself overnight, roll and form each piece into a rope like shape.
Place your dough ropes/sticks onto a greased or parchment paper lined cookie sheet.
STEP 3: RISE
Let this rise for at least an hour until the breadsticks are noticeably puffier. Keeping it in a warm place with help it to rise faster.
STEP 4: BAKE
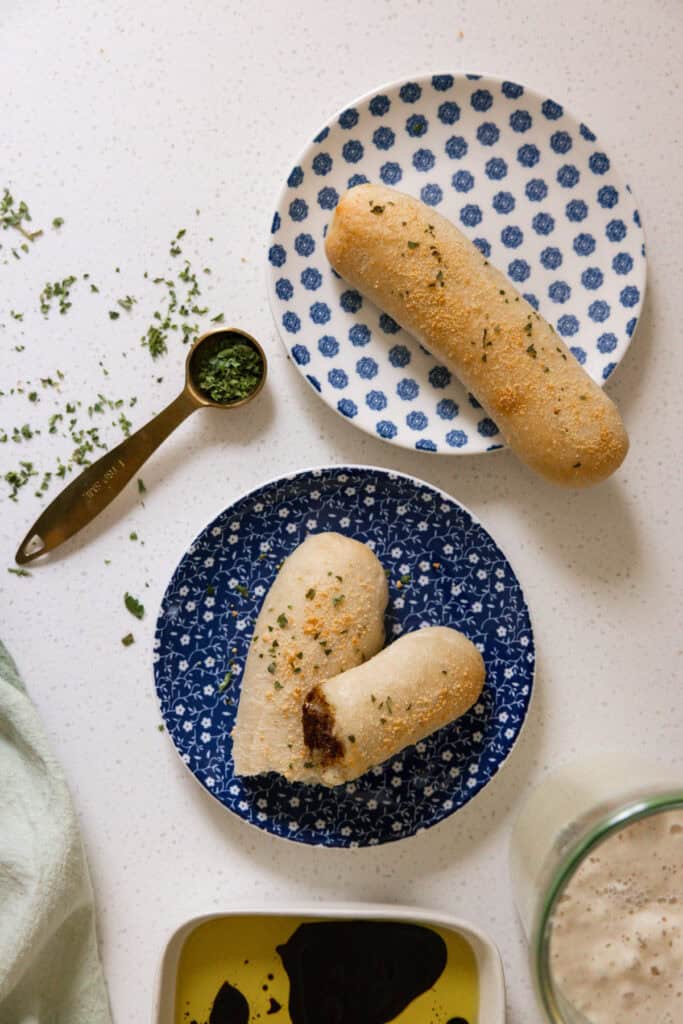
Brush the top with melted butter and sprinkle on your toppings. The butter will act as a glue for everything to stick on! Bake for 15 minutes or until golden brown.
Stay In The Loop!
Sign up and get my posts sent right to your inbox!
How To Store
Keep your breadsticks in an airtight container or bread bag in the fridge for 7 days. Reheat in the microwave to enjoy again!
If you enjoyed this recipe, be sure to share and tag me @sarahthereseco on Instagram and come back here to rate and leave a comment!

Sourdough Breadsticks
Ingredients
- 100 Grams Bubbly Sourdough Starter
- 1 Cup Water
- 3 Tablespoons Coconut Oil Melted and cooled
- 3¼ Cups Flour
- 3 Tablespoons Sugar
- 1½ Teaspoons Sea Salt
Toppings:
- Parmesan Cheese
- Minced Garlic
- Garlic Powder
- Sea Salt
- Parsley
- 1 Tablespoon Butter For melting
Instructions
- The night before you want to enjoy this recipe, in either your bread machine or with your stand mixer with dough hook attachment, add in order, the starter, water, oil, flour, sugar and salt to your mixer. Turn on machine and let it knead and mix until a dough has formed. If using the bread machine, simply turn on the dough cycle and leave overnight. If using the stand mixer, after the dough is fully needed and glossy looking, remove the bowl from the mixer and cover with a damp cloth overnight on the counter.
- 2 hours before baking, remove the dough from the bowl and place onto a non-floured surface. This dough is quite glossy and shouldn’t stick to the surface! Divide the dough into 12 equal pieces and roll into your desired breadstick shape. Cover the dough with a damp tea towel for 10 minutes on your counter. This will help with texture and final shaping. Remove the towel and again, reshape the breadsticks, using your pinkie fingers resting on the counter and palms facing you, pull the dough towards yourself creating tension thru the top of the dough. Place onto a cookie sheet or pan or pizza pan and let rise for 1 1/2-2 hours. I like setting my oven to BREAD PROOF and set them in there for the time being.
- Once that is complete and your breadsticks have puffed up, remove them from the oven (if that is where you have set them to rise) and turn on your oven to 375 degrees. Melt the extra tablespoon of butter in the microwave and brush this onto of the breadsticks. Now sprinkle your toppings onto the sticky buttery surface! I like starting with garlic powder and then putting on parmesan cheese, smoked salt and dried parsley. TIP! If you want to make your breadsticks a little more crisp, spray them down with water from a spray bottle BEFORE you bake them to help the top crust a little more.
- Bake at 375 for 15 minutes or until the underside is golden brown.
- Eat right away or store in the fridge for 7 days. Reheat in the microwave to enjoy again!
Hi Sarah, beautiful website!
Would I be able to make these breadsticks in one day?
Hi Emma, thank you! If you needed to make them in one day and keep them true to a fermented sourdough, you would have to start early in the morning and keep the dough in a warm place constantly until visible rising has occurred. If you need them very fast, a tsp of yeast in the mix will do the trick!
Ok. Thanks you!
Okay, thank you! Also what if I made the dough in the evening, place it in the fridge for an overnight ferment, and then take it out in the morning and let it ferment on the counter until an hour before dinner time to shape them? Do you think that would work?
Did you ever try this out, if so, how did it work? I also would want to make this for dinner, instead of around lunch time.
You can make these for lunch or dinner! Just place the dough in the fridge in the morning if worried about the dough over fermenting and take it out about an hour before you need to shape!
Hi Sarah!
I’m struggling as I always get sticky dough when trying your sourdough recipes, do you please know why this might be? My theory is that my bread machine does not properly knead the dough as I never get that nice stretch from it. I’m planning to try using a stand mixer soon to test my theory. But at the same time I don’t know why that might be as it has the same “hook” as yours, although it has 2 (ETA Delicca II). Could this be the problem? Or anything else comes to mind?
Thank you so much in advance!
PS: I love your website just as I love your videos, thanks for all your work!!♡
Hi friend! Sorry about the trouble, sourdough is so tricky (and sticky!) especially during these warmer days. Sounds like your bread is over fermenting. That will yield a sticky, formless dough that can be just brutal to work with. I recommend a few things to try! Make your dough in the morning and bake in the evening. It will have less time to ferment and become sticky. OR you can make the dough at night, place in the fridge once done kneading and remove from the fridge the next day to shape and rise and bake. Hope this helps, let me know if you need anything else! Thank youuuu! 🙂
It could also be that Canadian flour is more water absorbent than US flour! We live close to the border and often buy Canadian flour, but we always have to use slightly less flour because of this. So if your recipes are developed using Canadian flour, we just have to add slightly more to get the same texture
Yes! I have no experience with both US and Canadian flour, but I use less water into Sarah’s recipes and than it works well. 🙂