This recipe came as a hero of sorts as my children told me they wanted something other than buns to pair alongside their dinners. This was wild to me. I could never get tired of buns but my kids were done with them for the time being and needed a change. And maybe I did too. So back to the kitchen I went to create something a little fun and not typical for the everyday bun. That is how these garlic knots were born.

You just simply cannot go wrong with butter and garlic. Like EVER. So that is where I started. Add in some sourdough wonder, herbs and a fun twist, and ta da! These sourdough discard garlic knots leave my kids asking for more and telling me “You should make these more often!”. To keep the wonder and enjoyment of them alive though, I keep these for a more special occasion such as having people over or a fancy dinner.
Don’t be fooled though! These are easy to make, special occasion or not!
Since these are made with discard and are not going thru an overnight fermentation, you are still getting the benefits of using the discard AND the longer you can let the dough sit in the day, the better it is for you!
Why Sourdough Discard?
I was gluten free for years after experiencing migraines and headaches anytime I touched gluten. A friend told me that they found they were able to enjoy ALL glutenous goodness as long as it was made with a fermented sourdough starter. This intrigued me because GF bread was just not doing it for me.
Within 24 hours, I got myself a sourdough starter and began to figure this out. Within a week of eating sourdough fermented breads and baked goods, I boasted of zero migraines/headaches AND even saw my skin clearing up.
Fast forward to now, I bake all our own bread or baked goods by use of an active sourdough starter or with the discard. Either way, my body (and my family’s body!) loves it!
This recipe does just use a sourdough discard and is not an overnight fermentation option, which really is the best for your gut, but that doesn’t mean sourdough discard is without its own goodness.
Here are some sourdough discard facts for you:
- Sourdough discard goods are easier to digest: It contains a natural bacteria and variety of probiotics which promote a healthy gut and overall, a better digestive system. Basically, very gentle on your gut!
- Blood sugar friendly: Sourdough discard works against and balances any bad starches and ingredients that can cause your blood sugar levels to rise and spike.
- Full of good acid: The acid in sourdough breads and sourdough discards can help your body process foods easier and absorb more minerals, yielding a stronger immune system and better health.
- Fibrous: Sourdough discard is loaded with fibre to help you feel fuller for longer and lower cholesterol.
- The flavour: Sourdough has a tang and flavour like no other bread or baked good. It is hearty, satisfying and extremely delicious, whether it is fermented or made with sourdough discard.
- Vitamins and minerals: From iron to zinc to vitamin B, sourdough discard contains a variety of essential vitamins and minerals!
Sourdough Discard Garlic Knots Ingredients
- Water: I use a filtered, lukewarm water which will help our leaven develop quickly.
- Active Yeast: This is our leaven. It works very fast, making this a same day sourdough recipe.
- Sourdough Discard: If you have a bubbly starter, that will also work too! My discard is typically room temperature.
- Butter/Coconut Oil: This ingredient will help to soften the texture and give it a good chew. I use salted.
- Flour: The flour I use is sourced from an organic mill in my area, but any all purpose flour will do!
- Sugar: I use an organic cane sugar for this recipe. It adds a complimentary sweetness to the tang of the discard too!
- Salt: I always use sea salt for the best flavour and health benefits!
- Parsley: Use dry or fresh.
- Garlic: Either powdered or fresh!
- Pepper: Extra warm flavour.
To make this recipe, I use these tools. Click the text to shop:
*Some links are affiliate*
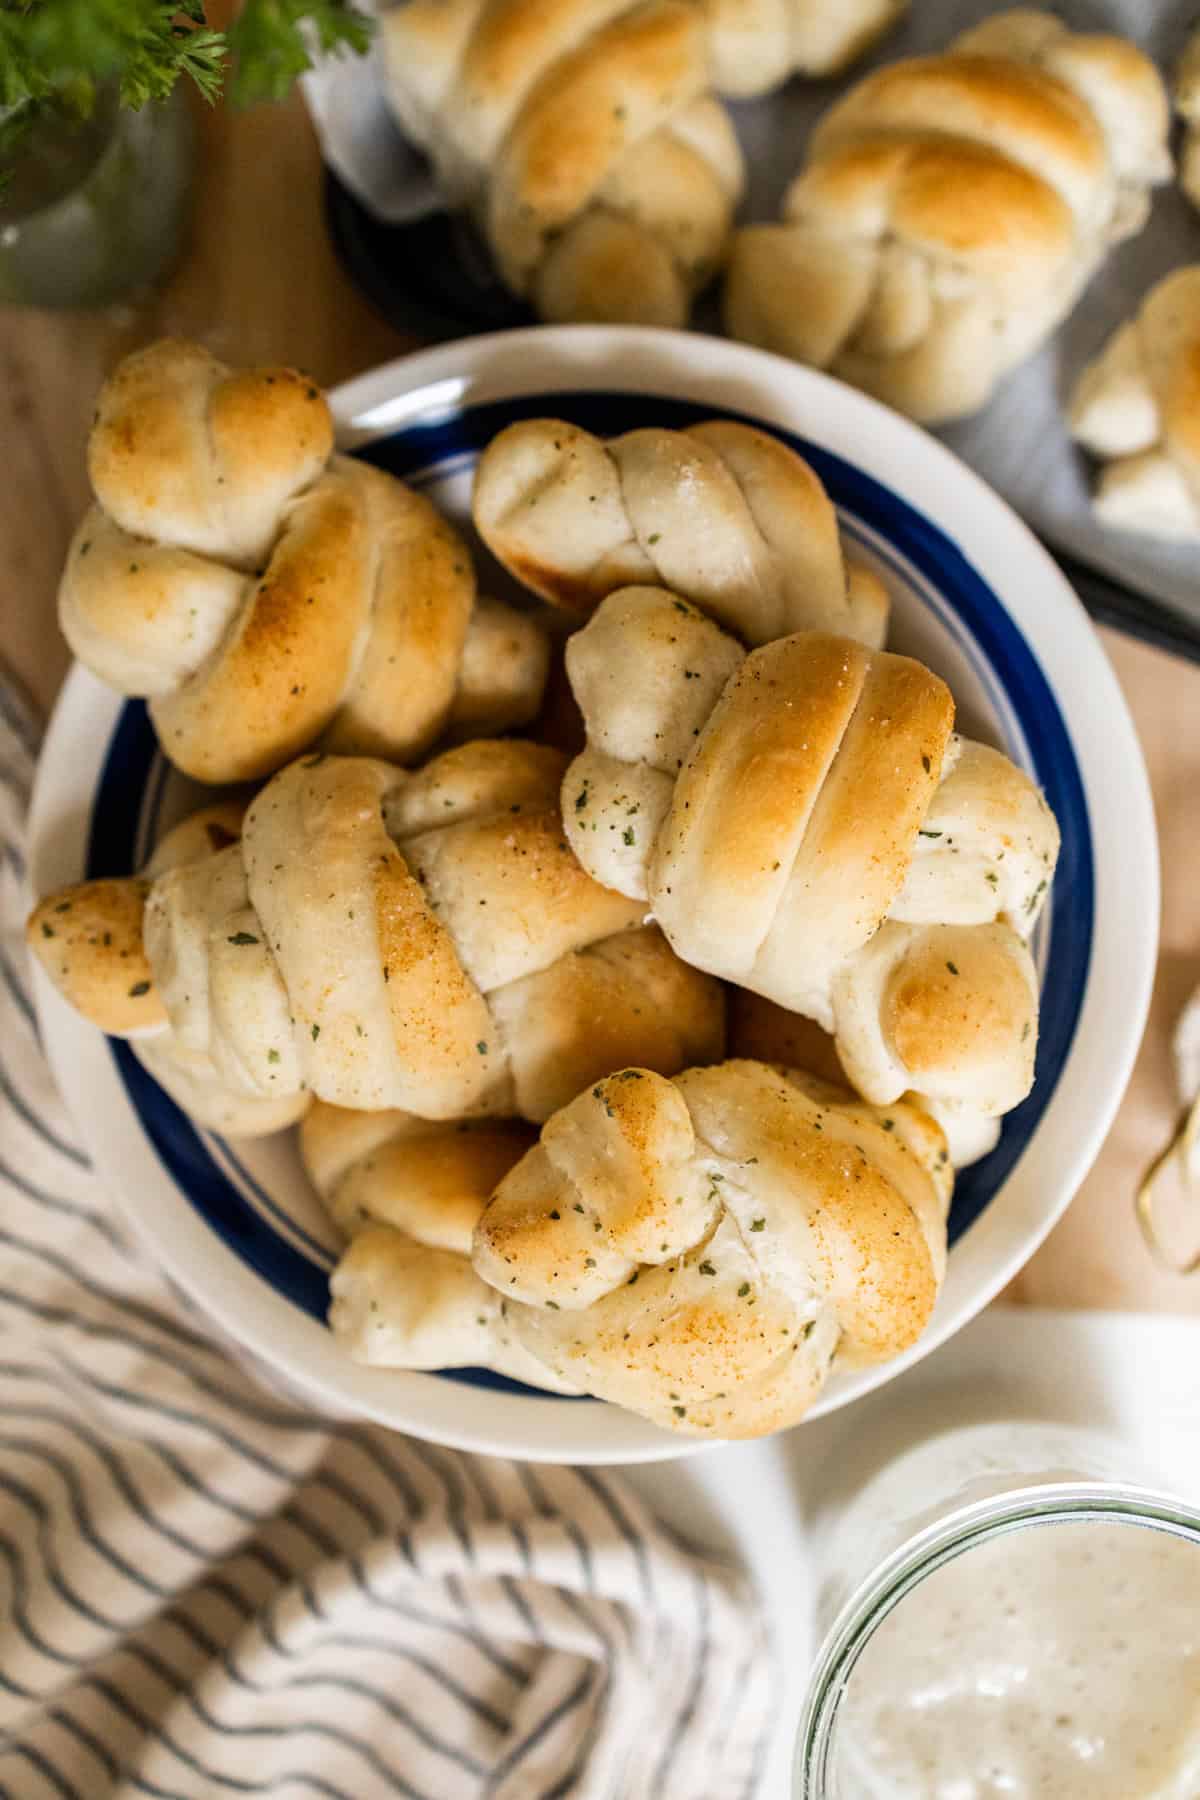
You do not have to stop at just garlic and parsley for flavour! Add some parmesan or chilies or sun-dried tomato or anything that would sound amazing in a soft butter bread. We personally enjoy cheese and smoked paprika with thyme!
Not wanting to make knots? No problem! These can be twisted into bread sticks too!
How To Make Sourdough Discard Garlic Knots From Scratch
If I am planning on having these later in the day, I will prep and form the dough (using my bread machine) in the morning. This gives the dough time to mix, knead, rise, be filled, rolled, cut and rise again before baking! Take a look at my bakers guide below to help with timing. And as usual, feel free to experiment! Temperature, sourdough hydration and many other factors will influence your breads results.
The dough can be mixed by use of a bread machine or a stand mixer using a dough hook attachment. I prefer my bread machine since it kneads and rises my dough while I can get other things done around the home! I do get asked often if you can use your hands and YES, it is possible. It will require extra work, but it will be worth it.

Baker’s Timeline:
Since this is a discard recipe, it can be made same day! Be that as it may, here is a bit of a timeline to help you out and give you an idea of what this may look like in a given day. You can easily tighten up the time on this baking schedule by reducing the amount of time you have it sitting from morning to afternoon BUT I like for my sourdough starter to have little bit of time to further flavour in the bread. This is not necessary though, just a personal preference.
STEP 1: MAKE THE DOUGH
Combine your wet and dry ingredients using either a bread machine or a stand mixer. If using a stand mixer, after the dough is combined, over and let rest for at least 1 hour. The dough while develop in flavour and texture during this time.
STEP 2: FLAVOUR, KNOT & RISE
When dough has visibly risen, remove the dough from your bread machine or bowl onto a floured counter. Wet your hands as you remove the dough since it may be a little too sticky for dry hands to work with.
Roll the dough evenly into 8×15 rectangle.
Over the dough rectangle, spread your tablespoon of soft butter over the entire surface and add on your spices and herbs.
These directions here are based on having the short 8″ end closest to you and length of 15″ coming away from your body. Cut rectangle width wise with a long sharp knife thru the 8″ section into 3 equal pieces. Each of those pieces need to be cut vertically into 6 pieces leaving you with 18 pieces. Once completed, each piece needs to be cut in 1/2, leaving you with 36 pieces.
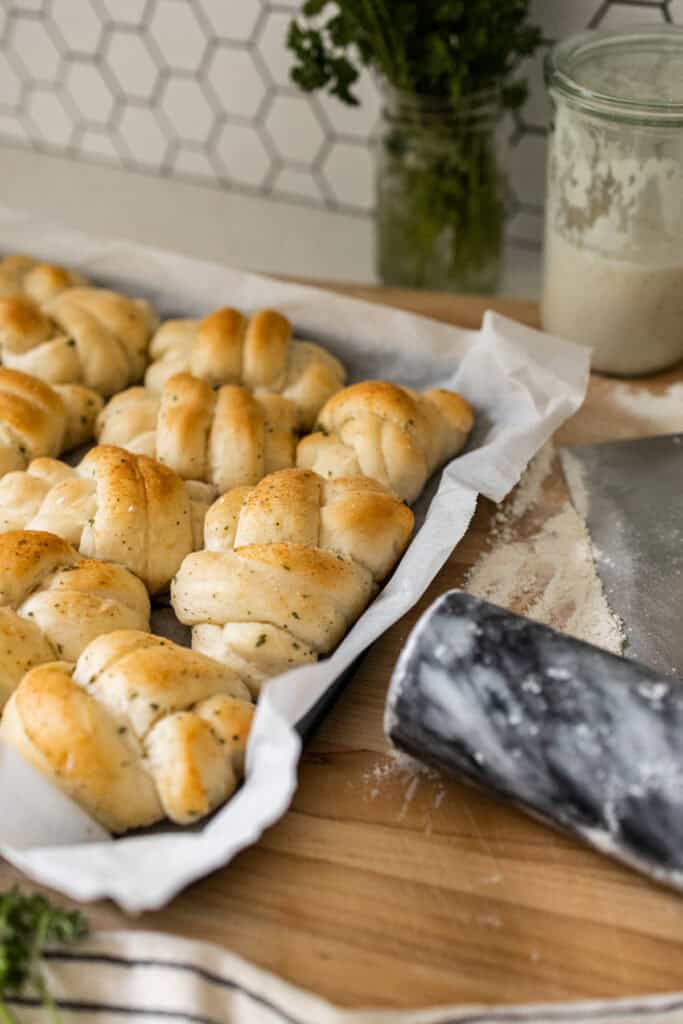
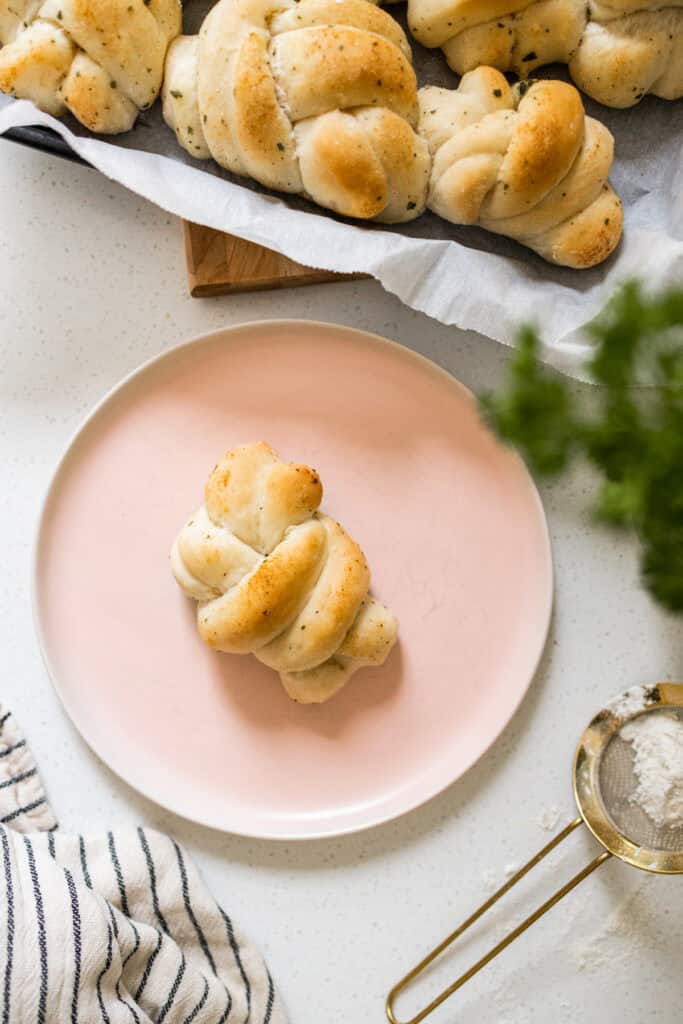
Take 2 pieces and tie the dough into a loose knot. Having 2 small “dough ropes” instead of just one not only looks better but cooks better too! Place onto a greased baking sheet or lined with parchment paper.
Repeat this to all the dough pieces, making 18 knots total.
Let the dough rise in a warm place for at least an hour or until very visibly puffy.
STEP 3: BAKE
Brush the tops with extra melted butter and bake at 375 degrees for 15 minutes or until golden brown. Brush extra melted butter over the tops again to encourage a flakey crust!
Stay In The Loop!
Sign up and get my posts sent right to your inbox!
How To Store
Keep your garlic knots in an airtight container in the fridge for 7-10 days and reheat to enjoy again.
If you enjoyed this recipe, be sure to share and tag me @sarahthereseco on Instagram and come back here to rate and leave a comment!
Sourdough Discard Garlic Knots
Ingredients
- 100 Grams Bubbly Sourdough Starter or Discard
- 1¼ Cups Water
- 2 Teaspoons Yeast
- 2 Tablespoons Coconut Oil or Melted Butter
- 3¼ Cups Flour
- 3 Tablespoons Cane Sugar
- 1 Teaspoon Sea Salt
Filling:
- 1 Tablespoon Soft Butter
- 1 Teaspoon Dried Parsley
- 1 Teaspoon Garlic Powder or 2 minced garlic cloves
- ¼ Teaspoon Black Pepper
Instructions
- Add all your dough ingredients in order as listed into your bread machine or stand mixer. If using a bread machine, set the machine to a dough cycle which will work to knead and rise the dough a few times during its cycle. I use the KBS bread machine and for me it is cycle 14 titled “Leaven Dough”.
- If using the stand mixer, after the dough is fully kneaded and glossy looking, cover with a damp towel and let sit in a warm place for at least 2 hours.
- When dough has visibly risen, remove the dough from your bread machine or bowl onto a floured counter. Wet your hands as you remove the dough since it may be a little too sticky for dry hands to work with.
- Roll the dough evenly into 8×15 rectangle.
- Over the dough rectangle, spread your tablespoon of soft butter over the entire surface and add on your spices and herbs. My kids prefer this with garlic powder but feel free to use fresh minced garlic here. I also enjoy the flavour of parsley and pepper sprinkled thru here as well, but feel free to top it with whatever you like. We love adding parmesan too!
- These directions here are based on having the short 8″ end closest to you and length of 15″ coming away from your body. Cut rectangle width wise with a long sharp knife thru the 8″ section into 3 equal pieces. Each of those pieces need to be cut vertically into 6 pieces leaving you with 18 pieces. Once completed, each piece needs to be cut in 1/2, leaving you with 36 pieces.
- Take 2 pieces and tie the dough into a loose knot. Having 2 small “dough ropes” instead of just one not only looks better but cooks better too! Place onto a greased baking sheet or lined with parchment paper.
- Repeat this to all the dough pieces, making 18 knots total. Do not crowd the sheet, feel free to divide the dough among 2 sheets for sake of space since these do rise quite a bit.
- Let the dough rise in a warm place for at least an hour or until very visibly puffy.
- Brush the tops with extra melted butter and bake at 375 degrees for 15 minutes or until golden brown. Brush extra melted butter over the tops again to encourage a flakey crust!
- Eat once cooled or store in the fridge for 7-10 days. Reheat to enjoy again!
My son asked for the garlic bread and I remembered about your video making these. So I made them today and now I can’t stop eating them! They turned very soft and delicious. Everyone enjoyed them. Thank you for the recipe!
So glad, thank you for sharing!
Thia recipe is amazing! I’ve just started keeping sourdough starter (actually Italian pasta Madre) and I’ve tried this recipe: it’s already become an all time favorite in our family! I’m slowly working my way through every single one of your recipes and I’m so glad that you set up this wonderful website. God bless you and your family ♥️
Hi Sarah!
I am reaching the end of my 2nd pregnancy and I am making a plan for freezer meals, do you think this is something I can freeze and reheat?
thank you!
I have been able to do this with great results! Either warming up in the microwave or in the oven to enjoy again after freezing!
So so yummy! They were so soft and fluffy and the best sourdough flavor! I made them without the yeast and just popped them in the fridge for a day to let it slowly rise and oh my! Awesome recipe!
Hi Callie, did you let it rise overnight and then put it in the fridge in the morning, and then the next day baked it? I thought I had yeast, but I don’t…so I’m trying to figure out how to make it work…
I haven’t made these yet but I am wanting your advice on using the bread machine to make doughs because it does seem like a very practical time saving tool for mama. Is there an order to which you add ingredients or can you just throw it all in? What setting do you use? Any other bread machine advice is appreciated. TIA!!
My bread machine is my right hand man in the kitchen, does all the hard work for me! I put my wet ingredients first followed by the dry. Almost always as listed in order in my recipe card. I like my KBS bread machine because of its multiple settings and it can even make yogurt and jam. The bin is ceramic lined so it’s a great not toxic option. The customer service is incredible and they have sent me a replacement bin for free no questions asked!
This is my go to recipe whenever I need a side for a pasta dish. My family devours them every time!
So good! I made them a few days before I needed them and planned on freezing some since I don’t have a big family but we easily ate them all! They are good to have with a meal or even a quick snack!
This recipe is perfect! I love how soft and fluffy these came out, I will definitely be making again!