Pizza night is a classic family feast, so it must be both simple and delicious. This homemade sourdough discard pizza dough is easy to make, requires lots of your extra sourdough discard you need to use up AND tastes incredible. Whether you want that big crust or a thin crisp, this recipe is very versatile and made for all. No time to waste! Let’s begin!

We were that family that bought $5.99 frozen pizzas for pizza night and called it a day. Is this bad? NO! But when I looked at the ingredients in a simple storebought pizza, I thought I could do better. Better ingredients, better taste and maybe even a better price.
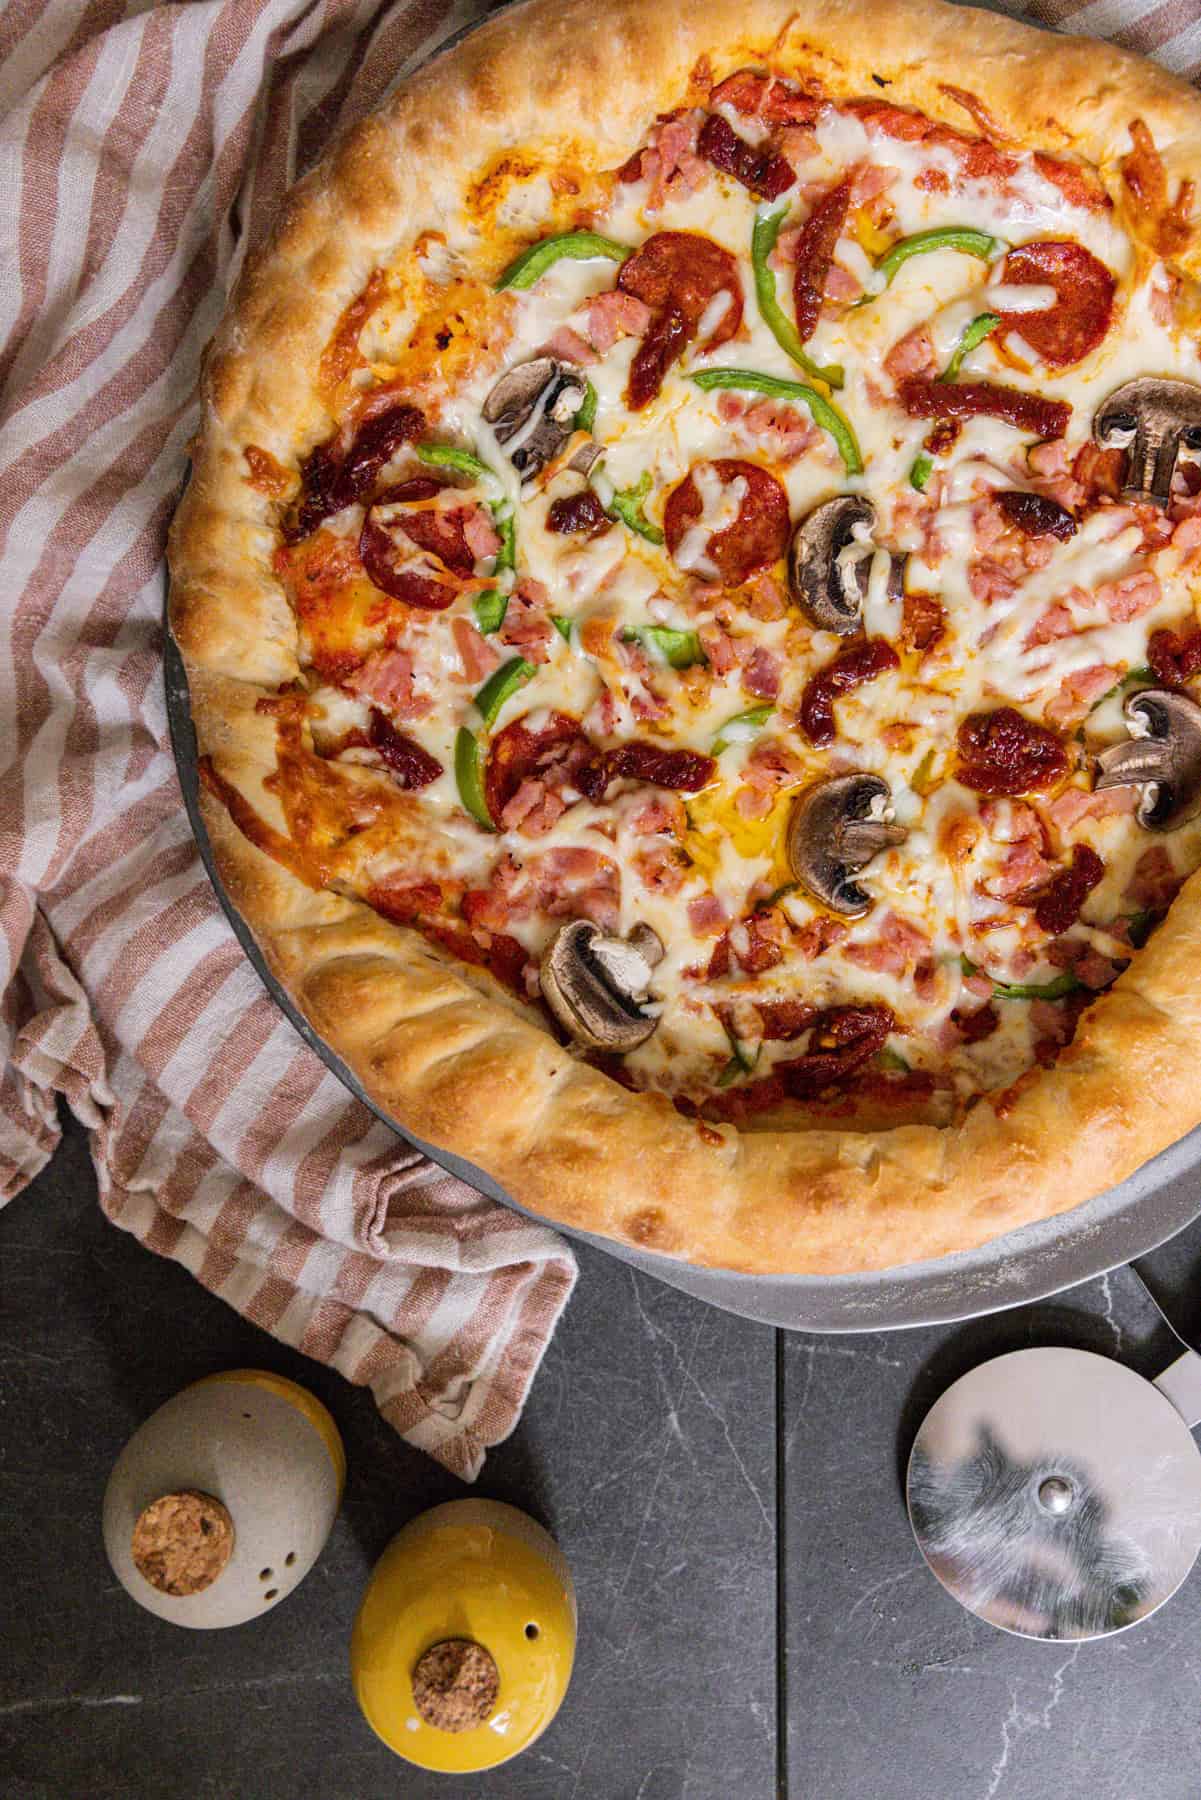
This is now our favorite to use up discard and enjoy a really good homemade pizza.
Our family of 7 has 1-3 batches of this pizza dough to feed us all well for pizza night and give us leftovers. If we are leaning towards a thick crust pizza, we will use about 3 batches of the pizza dough to yield a thicker chewy crust, baked on the higher oven racks. When a thin crust is what we are craving, we will use 1-2 batches and roll that dough really thin and bake it on the lower racks in the oven.
There are also 2 ways to bake this pizza! Either with a classic pizza pan OR, my personal favorite way, a pizza stone.
Enjoy a REALLY good ‘za and pair this crust with my 2 Minute Pizza Sauce recipe!
Why Sourdough Discard?
I was gluten free for years after experiencing migraines and headaches anytime I touched gluten. A friend told me that they found they were able to enjoy ALL glutenous goodness as long as it was made with a fermented sourdough starter. This intrigued me because GF bread was just not doing it for me.
Within 24 hours, I got myself a sourdough starter and began to figure this out. Within a week of eating sourdough fermented breads and baked goods, I boasted of zero migraines/headaches AND even saw my skin clearing up.
Fast forward to now, I bake all our own bread or baked goods by use of an active sourdough starter or with the discard. Either way, my body (and my family’s body!) loves it!
This recipe does just use a sourdough discard and is not an overnight fermentation option, which really is the best for your gut, but that doesn’t mean sourdough discard is without its own goodness.
Here are some sourdough discard facts for you:
- Sourdough discard goods are easier to digest: It contains a natural bacteria and variety of probiotics which promote a healthy gut and overall, a better digestive system. Basically, very gentle on your gut!
- Blood sugar friendly: Sourdough discard works against and balances any bad starches and ingredients that can cause your blood sugar levels to rise and spike.
- Full of good acid: The acid in sourdough breads and sourdough discards can help your body process foods easier and absorb more minerals, yielding a stronger immune system and better health.
- Fibrous: Sourdough discard is loaded with fibre to help you feel fuller for longer and lower cholesterol.
- The flavour: Sourdough has a tang and flavour like no other bread or baked good. It is hearty, satisfying and extremely delicious, whether it is fermented or made with sourdough discard.
- Vitamins and minerals: From iron to zinc to vitamin B, sourdough discard contains a variety of essential vitamins and minerals!


Sourdough Discard Pizza Dough Ingredients
- Water: I use a filtered, lukewarm water which will help our leaven develop quickly.
- Active Yeast: This is our leaven. It works very fast, making this a same day sourdough recipe.
- Sourdough Discard: If you have a bubbly starter, that will also work too! My discard is typically room temperature.
- Olive Oil: Oil will help to soften the texture and give it a good chew. Use a light or dark.
- Flour: The flour I use is sourced from an organic mill in my area, but any all purpose flour will do!
- Sugar: I use an organic cane sugar for this recipe. It gives a softness to the dough, but feel free to use honey or leave it out.
- Salt: I always use sea salt for the best flavour and health benefits!
- Corn Meal: Helps with baking, texture and flavour.
- Garlic Powder: For flavour and aroma.
To make this recipe, I use these tools. Click the text to shop:
*Some links are affiliate*
If you are wanting a longer ferment for this pizza dough, make it the night before you plan on eating. Remove the yeast and use an active bubbly starter instead. Let the dough come together, rest in a warm place for a few hours and place in the fridge overnight. Bake next day.
How To Make Sourdough Discard Pizza Dough From Scratch
If I am planning on having homemade pizza later in the day, say for dinner, I will prep and form the dough (using my bread machine) in the morning or early afternoon. This gives the dough time to mix, knead, rise, rolled out and topped with sauce, cheese, etc. before baking! Take a look at my bakers guide below to help with timing.
The dough can be mixed by use of a bread machine or a stand mixer using a dough hook attachment. I prefer my bread machine since it kneads and rises my dough while I can get other things done around the home! If you are making this in a warm environment (in Spring or Summer) you may want to prep the dough closer to the afternoon to reduce any chance of the dough over fermenting.

Baker’s Timeline:
Since this is a discard recipe, it can be made same day! Be that as it may, here is a bit of a timeline to help you out and give you an idea of what this may look like in a given day. You can easily tighten up the time on this baking schedule by reducing the amount of time you have it sitting from morning to afternoon BUT I like for my sourdough starter to have little bit of time to further flavour in the bread. This is not necessary though, just a personal preference.
STEP 1: MAKE THE DOUGH
Combine your wet and dry ingredients using either a bread machine or a stand mixer. If using a stand mixer, after the dough is combined, over and let rest for at least 1 hour. The dough while develop in flavour and texture during this time.
STEP 2: SHAPE & RISE
Remove the dough from your bread machine or bowl onto a non floured counter. Wet your hands as you remove the dough since it will be a little too sticky for dry hands to work with. Shape into a ball and let rest.
STEP 3: TOP & BAKE
Flour a surface and gentle lift and place your dough on top. Flour the top of the dough and roll into a circle.
Take a fork and poke the dough about a dozen times to help it bake and heat better. Drizzle a little olive oil over the pizza and gently pat it into the dough.
Place your dough gently onto a greased pizza pan. Bake for 8-10 minutes without the toppings or until the inside is cooked and bubbled. Remove from the oven and finish by adding your toppings, starting with sauce, then cheese, then meats and veggies then a little more cheese.
Bake for 15-20 more minutes or until you have a golden crust.
This pizza dough recipe can be used for both a thin crust or thick crust pizza.
If you want a thick crust, 1 batch of pizza dough will work well for a 12″-16″ pizza. Simple roll it out to desired thickness and roll a thick crust. Bake this in a higher rack in the oven to encourage even baking without too much crisp.
If a thin crust pizza is what you prefer, divide the dough into 2 balls and roll very thin. Bake this on the lower oven rack to encourage that crisp!

Stay In The Loop!
Sign up and get my posts sent right to your inbox!
How To Store
Keep your pizza in an airtight container in the fridge for 7 days and reheat to enjoy again.
If you enjoyed this recipe, be sure to share and tag me @sarahthereseco on Instagram and come back here to rate and leave a comment!
Sourdough Discard Pizza Dough
Ingredients
- 1¼ Cups Water
- 1 Teaspoon Yeast
- 175 Grams Sourdough Discard
- 2 Tablespoons Olive Oil
- 3¼ Cups Flour
- 1 Tablespoon Sugar
- 1½ Teaspoon Salt
- 1 Tablespoon Cornmeal
- ½ Teaspoon Garlic Powder
Instructions
- Add all your ingredients in order as listed into your bread machine or stand mixer with dough hook attachment. If using a bread machine, set the machine to a dough cycle which will work to knead and rise the dough a few times during its cycle. I use the KBS bread machine and for me it is cycle 14 titled “Leaven Dough”. If the dough is looking too wet/sticky, add in a tablespoon or two of flour.
- If using a stand mixer, add in your wet ingredients and yeast, give it a good stir and follow up by adding in your dry ingredients and incorporating them using a dough hook. I personally prefer using a bread machine because of its multi knead and rise cycles, but if you are just using a stand mixer, you may have to let the dough knead for quite awhile to achieve that elastic dough texture. Add in a tablespoon or two of flour if the dough is looking too wet/sticky. When finished, cover with a wet tea towel and let it sit in a warm place for 1 hour.
- Remove the dough from your bread machine or bowl onto a non floured counter. Wet your hands as you remove the dough since it will be a little too sticky for dry hands to work with. Shape into a ball and let rest for 15 minutes.
For Baking On A Pizza Pan
- Preheat oven to 400 degrees.
- Flour a surface and gently lift and place your dough on top. Flour the top of the dough and roll into a circle. I roll it into about a 14" circle and then roll the edges to create a crust, making it about a 12" circle. Feel free to roll it even thinner to create a larger thin crust pizza and a smaller outer crust. I like both a thick or thin crust, so I change up the pizza size based on preference that day!
- Take a fork and poke the dough about a dozen times to help it bake and heat better. Drizzle a little olive oil over the pizza and gently pat it into the dough.
- Place your dough gently onto a greased pizza pan. Bake for 8-10 minutes without the toppings.
- Remove from the oven and finish by adding your toppings, starting with sauce, then cheese, then meats and veggies then a little more cheese.
- Bake for 15-20 more minutes or until you have a golden crust.
- Let it cool about 10 minutes before slicing and eating!
- Store in the fridge for 7 days and reheat to enjoy again!
For Baking On A Pizza Stone
- Place your pizza stone on the very lowest rack in your oven and preheat to 500 degrees. We want this stone to be very hot. I like to let my stone have at least 35 minutes to heat up before placing the pizza on it.
- Flour a surface (use corn meal as well here if desired) and gently lift and place your dough on top. Flour the top of the dough and roll into a circle. I roll it into about a 14" circle and like to keep it quite thin. You can either roll the pizza edging up to make a crust or leave it flat as is. The dough on the sides will naturally pop up without the toppings on them.
- Add your toppings to your pizza as desired. Open your oven and sprinkle a good amount of corn meal onto your pizza stone to prevent sticking. Using a proper pizza paddle, a cookie sheet or even your hands, place your pizza dough on top of the pizza stone. Set your timer for 6 minutes. After 6 minutes, rotate your pizza with a large metal/wood spatula and cook for another 6-8 minutes or until very well done and bubbly.
- Remove from the oven and let cool about 10 minutes before slicing and eating!
Hello lovely, thank you for the beautiful recipes. Our family has enjoyed the pizzas and the sourdough sandwich bread.
Question, can I prepare the pizza dough and leave the ball in the fridge to make pizzas over the weekend?
Thank you! And YES you totally can! I have kept the dough in the fridge for almost a week before baking for pizzas!
This recipe is 5 star! We have made it at least 5 times now and it comes out perfect each time.
This was yummy! I made it without a bread machine. I tried to make pizza dough with a bread machine tonight, and it didn’t seem to rise well… will have to try again. It was my first time using the machine.
I doubled the recipe the first time and made two thick-crust pizzas. Let me tell you they were THICK! I underestimated the amount of toppings and sauce I would need, pretty much all bread. I am not sure if I added too much yeast or if you just really like thick pizza haha. But I ended up doing it again and just splitting it into two for the thin crust and it has been the best pizza dough recipe I have tried to date!
I made the pizza dough today. I left it in the refrigerator for 3-4 hours before rolling it out. I split it for two thin 12 inch crusts. My husband and I were very pleased. It was flavorful and crunchy. This will be our go to pizza crust :-). Thank you.
I would love to try your recipes, but i noticed all of them required either a bread machine or a stand mixer and i dont have either. Can I mix the dough with my hands?
OF COURSE, using your hands is still a totally doable way of baking dough! Instead of kneading it all in one go I would encourage you to knead the dough for a few minutes, let it rest for 30 and knead again for a few minutes. A rest, knead, rest, knead cycle helps the gluten to develop and create a softer, more flexible dough!
I made this with active starter no yeast, did the dough function on my bread machine, then cold fermented it overnight in my fridge. I let it complete the rise the next day, and it came out as a beautiful, fluffy pizza dough that was delightful to work with!
Love the crunch that the cornmeal gives the crust. I take mine out of the bread machine and put it in the fridge until I’m ready to use it. And I personally love to put it on a cast iron skillet in a 500F oven for 12 minutes. Delish!
la mejor receta y muy fácil de seguir gracias por compartirla.
Can you use without corn meal?
Yes, the texture will just be a little different, but still so good!